The (hopefully) last of my attempts to find a solution that will allow me to scan my panoramic film photos at a high enough quality for my printing requirements.
I finally bought a scanner. Mainly for my Alpine Panoramics project. The key here is that the “scanner” I bought is actually a medium format digital camera, and to fund that I traded in some defunct medium format film equipment as well as the digital back that I was using with it.
What makes this setup ideal for scanning film is the a) high resolution sensor (102MP) combined with b) a feature that allows combining multiple shots to boost resolution: “pixel shift”, giving approx 400MP images.
Here’s the setup:
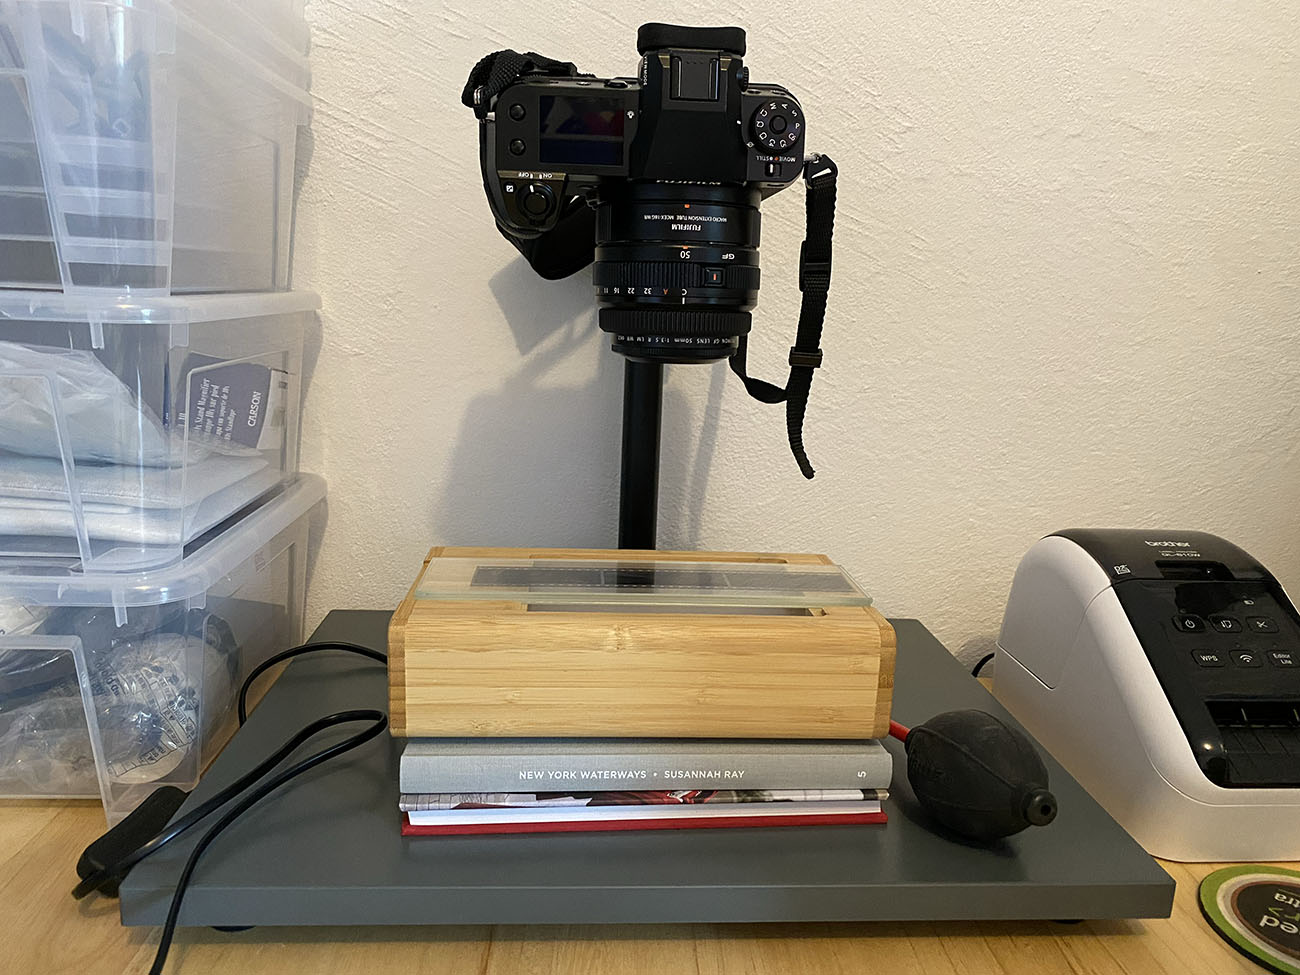
That’s a Fujifilm GFX100S + 50mm lens + 18mm extension tube attached to a copy stand with a light box to allow the negatives to be “scanned” (photographed). The pixel shift function takes 16 images and then you combine them with provided software to give a 1.5GB image.
Of course this camera also has other uses - it will likely become my workhorse for photo commissions as well as art reproduction in the gallery.
Alright, so how does it perform?
A New Test
My first test of this setup was scanning a photo from Toronto I took one week ago (at time of writing). It was shot on HP5 at 250 ISO, developed in Ilford Perceptol at 1:3 dilution.
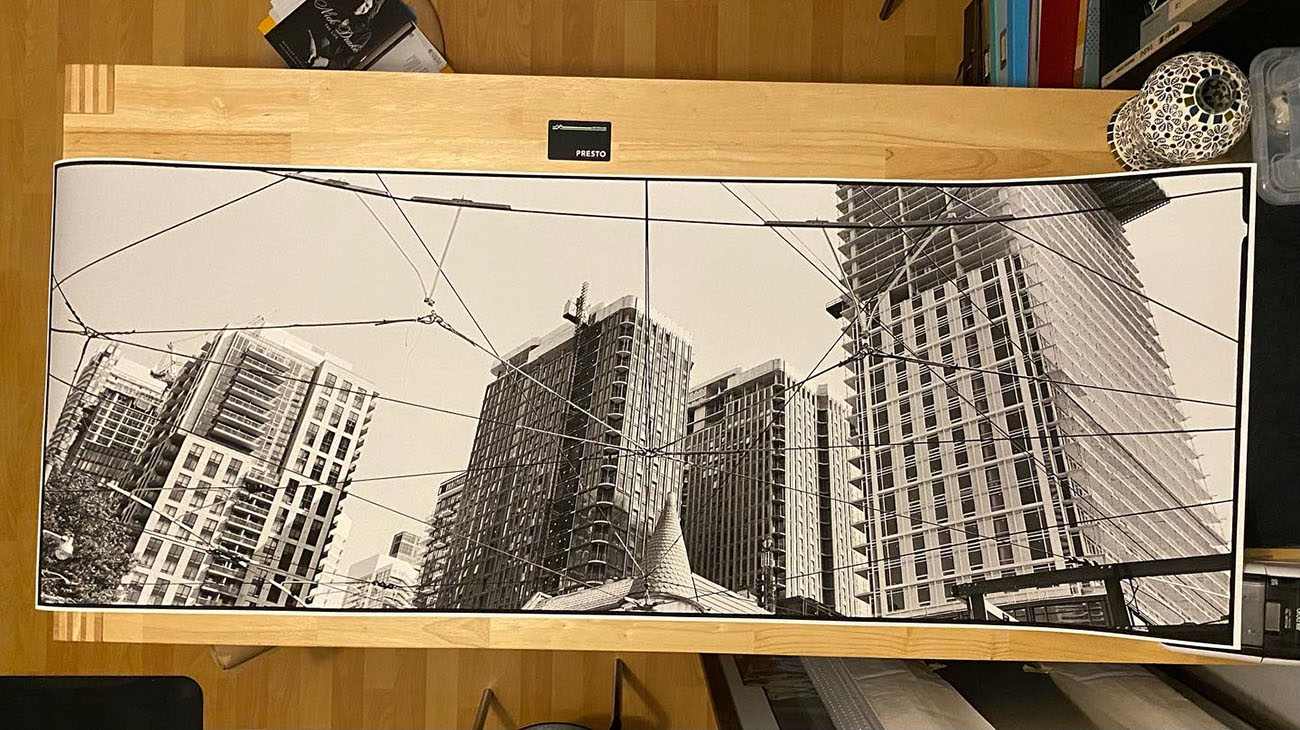
The proof of the scanning is in the printing, and here it is. A 160x60cm panoramic print, the largest size I can do with my current printer. The little black card above the print is for scale - it’s the credit card sized Toronto Presto card I used for the public transport there.
Given the quality of the scan I could probably interpolate up to easily do a print twice as large. Here are some crops from the scan, including one from the corner of the frame:
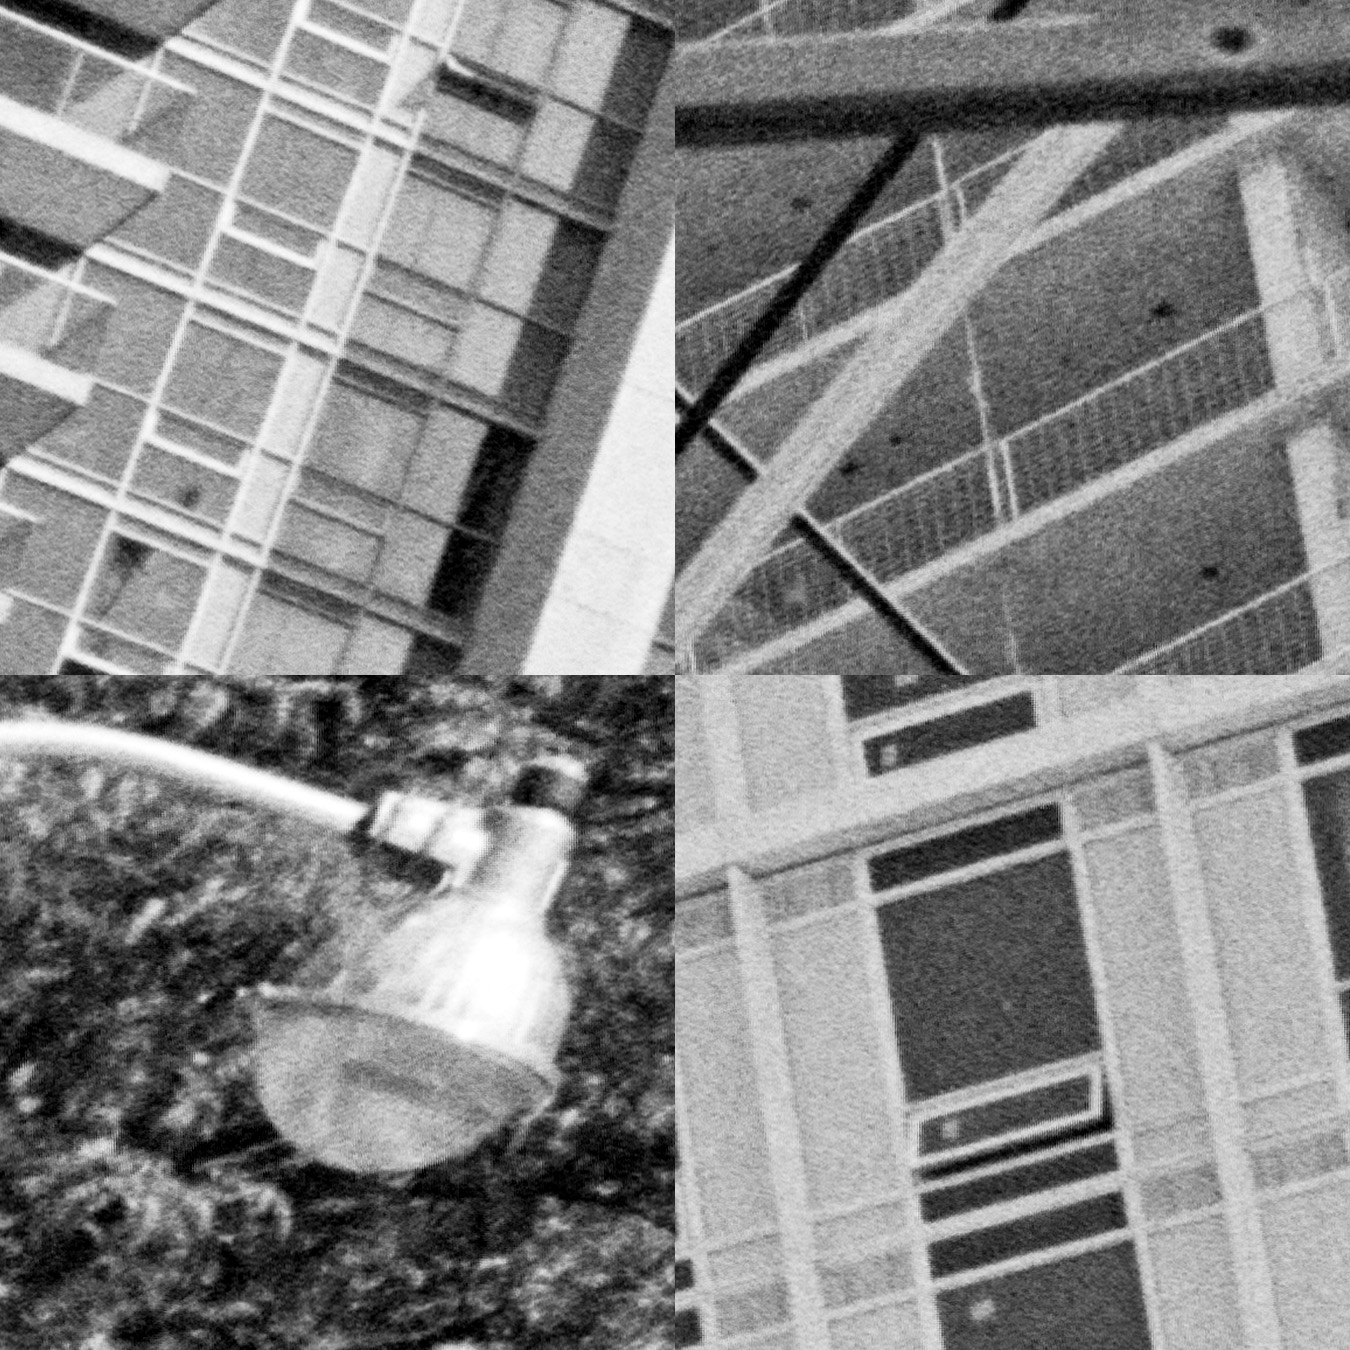
Those Xpan lenses were pretty good. Sometimes when I get the alpine panoramic negatives scanned I think there’s scratches on them, often it’s just the lens resolving power lines at the other side of the valley.
An Old Test
Just to bring a comparison in against an Imacon scan, since I know people will ask.
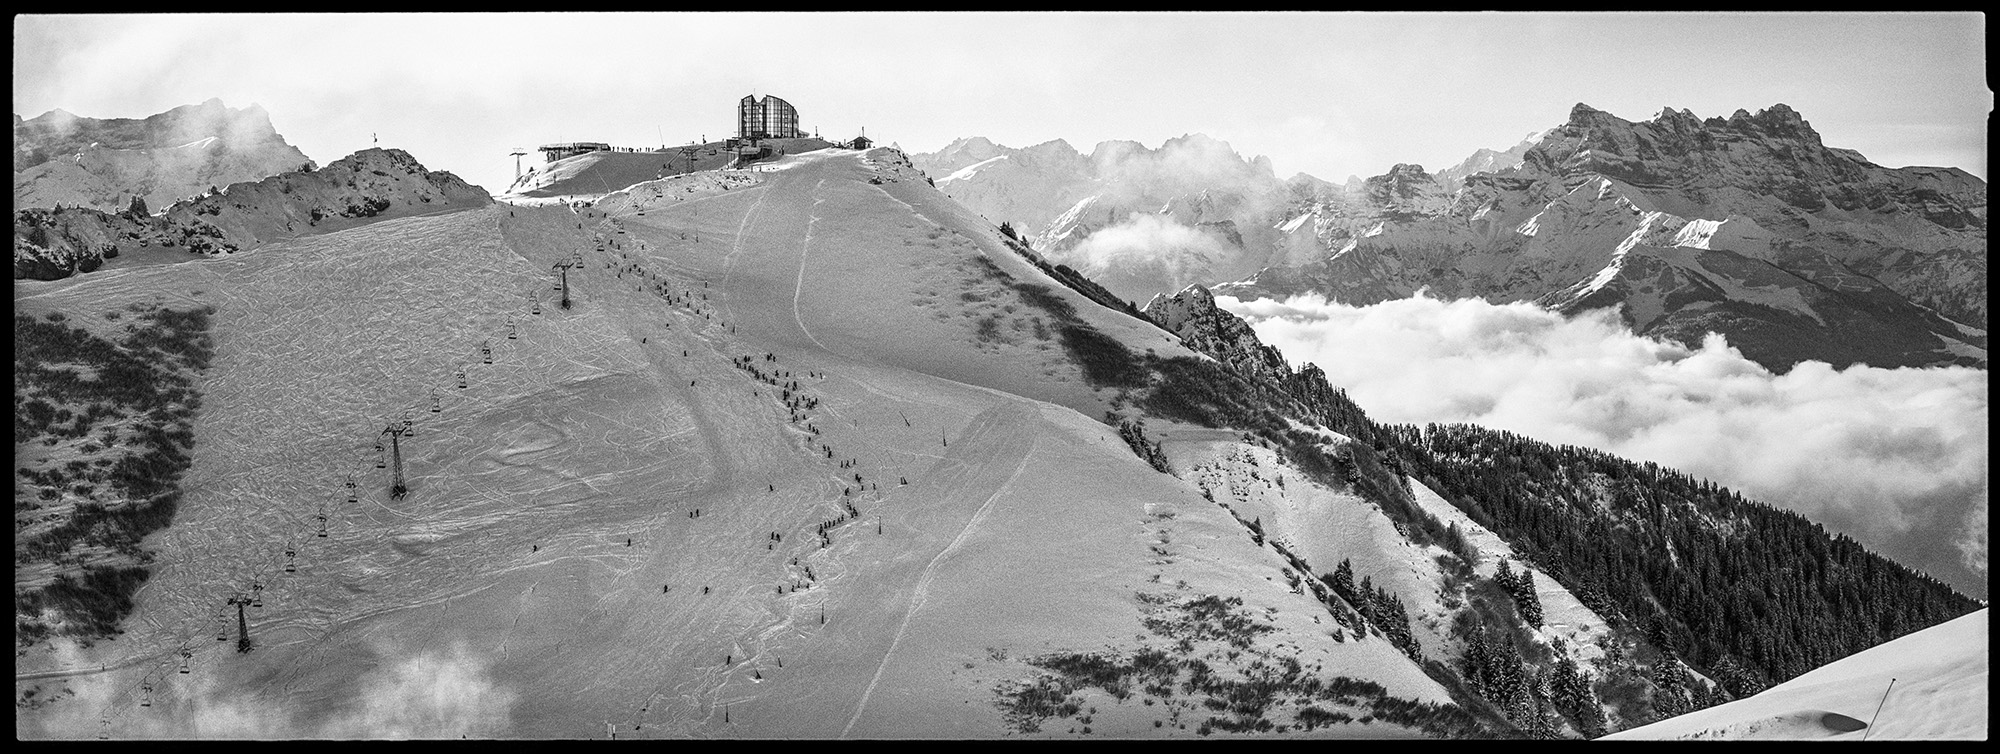
I’ve used this image before, including in the linked post at the top. It was the very first negative I had scanned with an Imacon back in 2016. The image below is an example of a crop from the above at 100% vs my Epson v700:
No contest there. You cannot do much with the Epson v700 scan, you can’t print that at more than 1/4 of the size of the full resolution Imacon scan without it looking poor, and you can’t interpolate it up as the detail is simply not there.
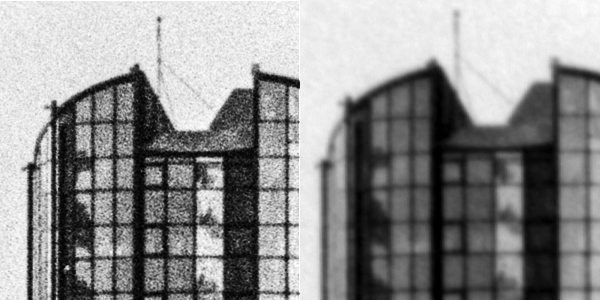
What about the Imacon vs the GFX 100S with the pixel shift stitching feature:
Much more of a contest. We can resolve the grain on both images to the point that we can even see the same individual grains of silver (look at some of those in the windows). That’s good enough for printing images to the same size as I need.
The main difference in the two is down to the dynamic range and contrast, and part of that will be explained by me probably having over exposed the “scans” from the GFX 100S a little. This is something I need to figure out as I use the setup more. I probably need to err on the side of under exposure and bring the shadows back in post to keep highlight detail.
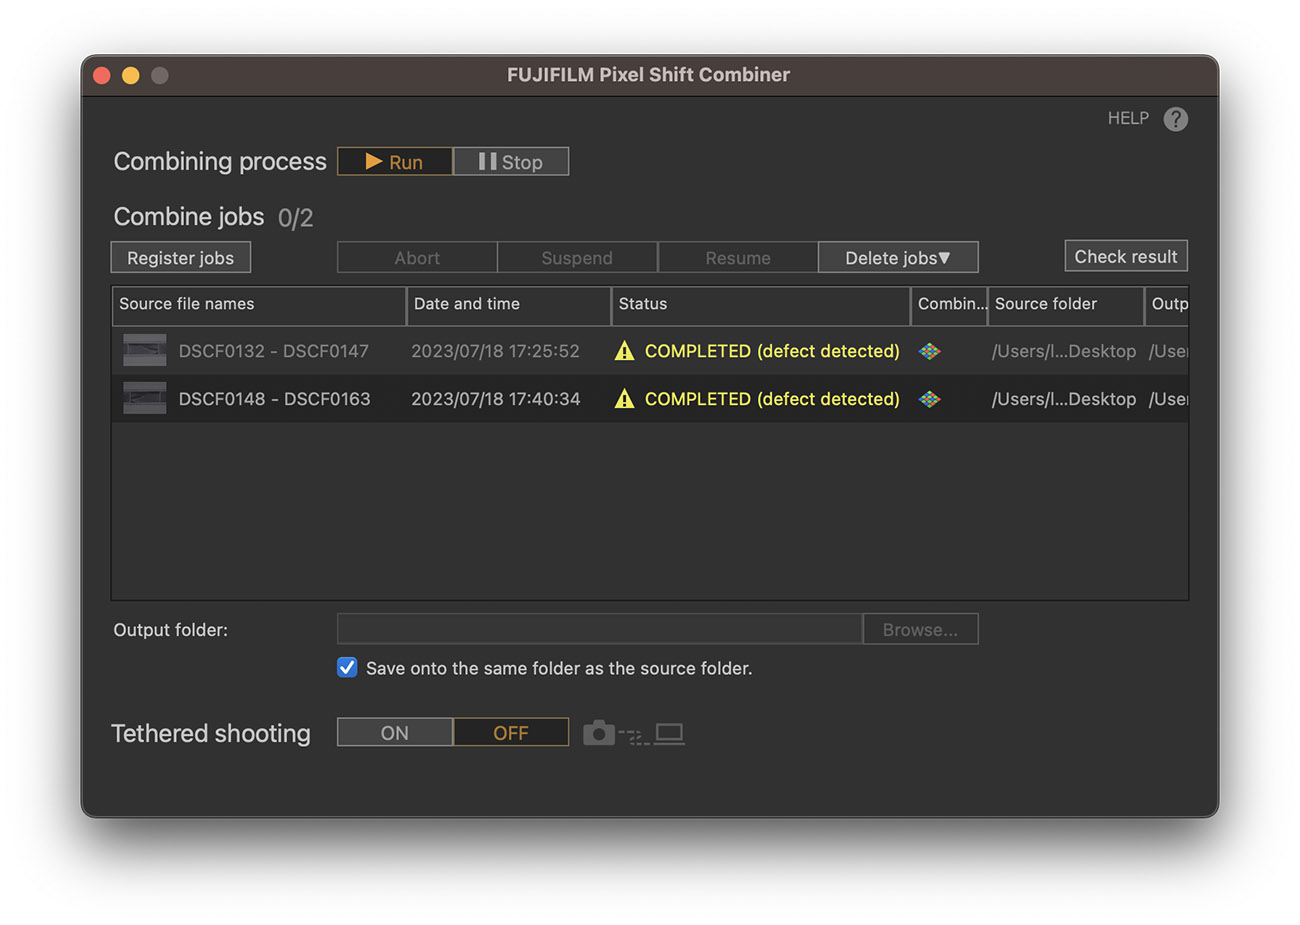
I also should note that there was an issue in the stitching, as evidenced by the odd blocks on the middle right of the image. The software Fuji provide to combine the images will tell you if it thinks there was an issue when the images were shot - The slightest vibration will cause a problem:
This may also be why the GFX 100S scan has some jagged edges visible. I need to look at the copy stand setup and dampen any vibration sources. It’s entirely possible the hum from an electric device nearby is responsible. It’s that sensitive to movement.
It could also be the grain in the negatives confusing the software, but I did manage to scan the Toronto image above without any errors so I’m not convinced it’s that.
Final Tweaks
It’s worth noting that the above examples are all from my early attempts with the setup - I have only had the camera for a few weeks and there are some things that could be looked at to improve the quality of the scans even more.
The first being the lens. I am using a 50mm standard lens with an 18mm extension tube. This is not optimal for scanning negatives due to some minor barrel distortion, however this can be corrected in post. If I looked at getting a dedicated macro lens this would have [almost] no distortion and be sharper.
The second is looking at more solutions for keeping the film flat. I am finding the final weakness in the flow here is just that. All other variables are as good as (if not better) than drum scanning - resolution, dynamic range, etc.
I am currently using a couple of pieces of anti-newton glass to sandwich the film, but the nature of the glass means that it reduces the quality slightly. The way Imacons have this beat is a clever solution that keeps the film flat:
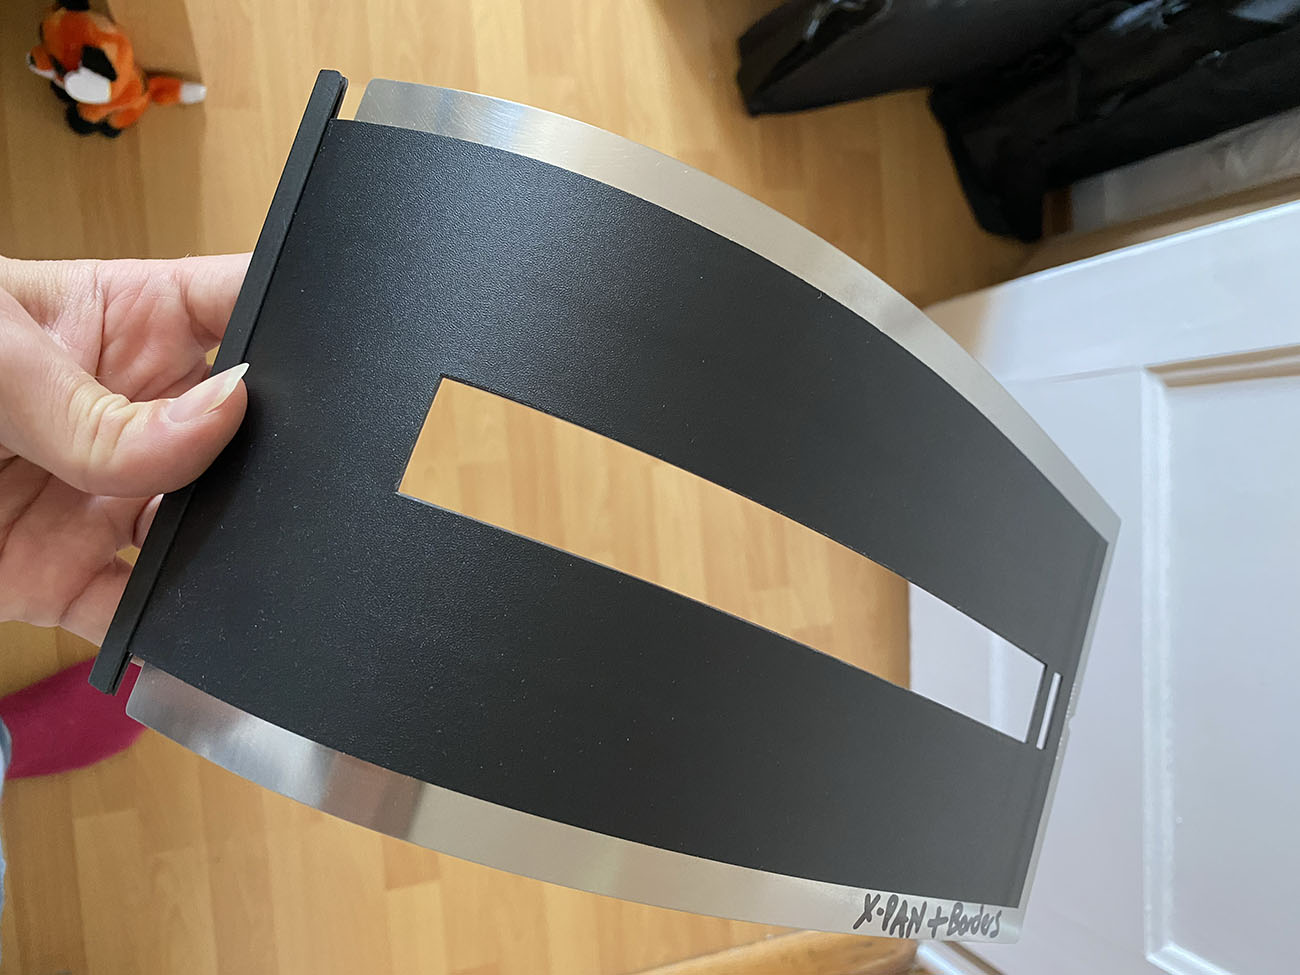
The above is an Imacon negative holder that flexes whilst at the same time keeping the film tight (flat). It’s where the name “Flextight” came from, and allowed those scanners to remove any glass from the scanning path. It’s a combination of thin metal, plastic, and magnets. The patents on this tech expired back in 2016 so you can now pick them up cheap from China.
If I can figure out a way to achieve something similar, a scan path with flat film but no glass, perhaps even using the above holder in some way, then I think I will have the Imacon beat.